To remove a broken oil filter first use an oil filter wrench to grip the filter tightly. Then turn it counterclockwise to unscrew and detach the broken filter from the engine ensuring a smooth and careful removal process.
Ever struggled with a broken oil filter don’t fret Learning how to remove a broken oil filter? is easier than you think. With the right tools and a few simple steps, you can tackle this automotive challenge effortlessly. Let’s dive into the quick and effective solution to get your engine running smoothly again.
To remove a broken oil filter first, wear gloves and safety glasses for protection. Next, use an oil filter wrench and turn it counterclockwise to loosen and remove the broken filter. Exercise caution to avoid any spills or injuries during the process.
Inspecting Your Oil Filter
Inspecting your oil filter is a crucial aspect of routine vehicle maintenance to ensure optimal engine performance and longevity. The oil filter plays a vital role in trapping contaminants and debris that can accumulate in the engine oil preventing them from circulating and causing potential damage.
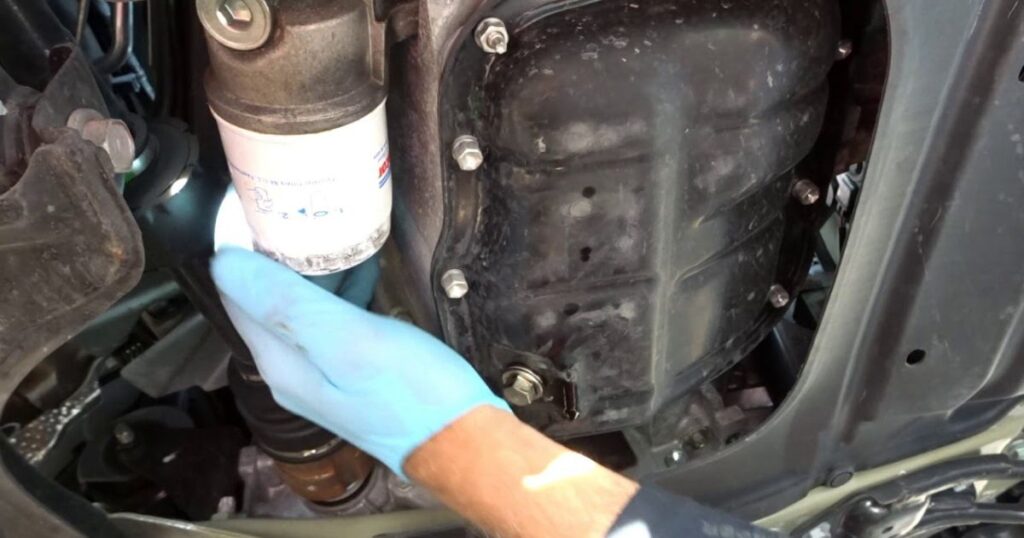
To inspect your oil filter start by locating it usually near the engine. Use a wrench to carefully remove the filter ensuring you have an oil pan or container to catch any oil that may drip during the process.
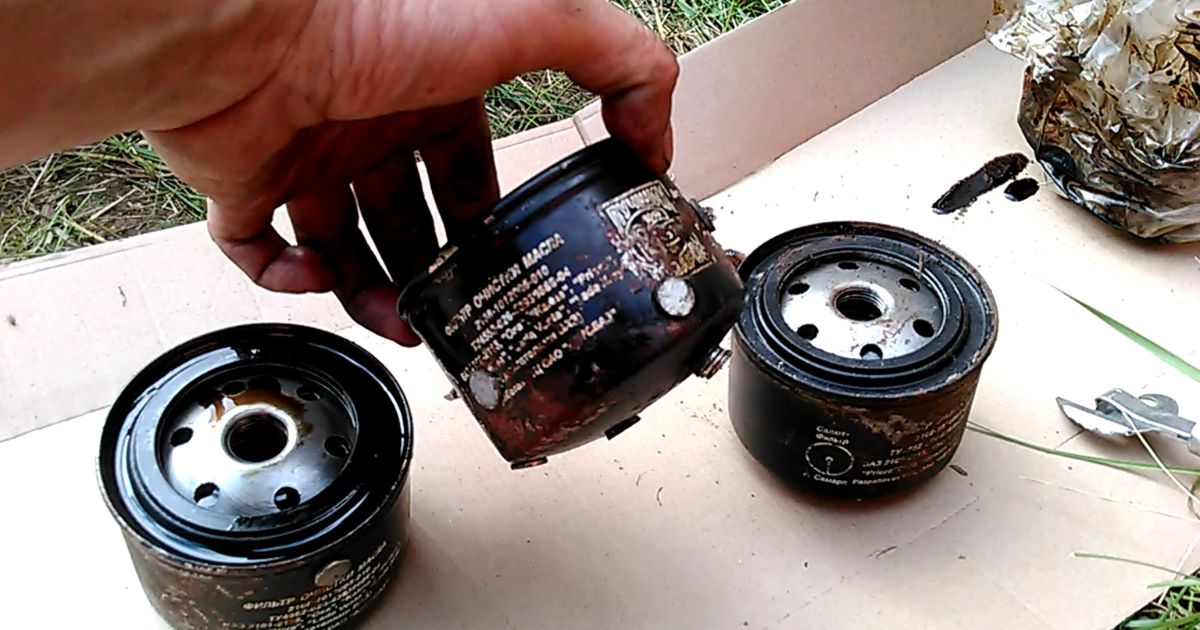
Once the oil filter is removed visually inspect it for any signs of damage or excessive debris accumulation. A clogged or dirty oil filter can lead to reduced oil flow diminishing the effectiveness of lubrication and increasing the risk of engine wear.
Inspect the sealing gasket on the top of the filter if it’s damaged it may cause oil leaks. If you notice any issues during the inspection it’s recommended to replace the oil filter promptly to maintain optimal engine health. Remember to dispose of the used filter and oil properly following environmental guidelines.
In some cases you may encounter challenges such as a broken oil filter during the removal process. To remove a broken oil filter consider using specialized tools designed for this purpose like an oil filter wrench with a gripping mechanism.
Carefully attach the tool to the remaining portion of the filter and turn it counterclockwise to loosen and remove the broken piece. Exercise caution to avoid damaging the surrounding components or causing oil spills.
If you encounter difficulties seeking professional assistance is advisable to prevent further complications. Regularly inspecting and replacing your oil filter is a simple yet effective way to promote the longevity and efficiency of your vehicle’s engine.
Is Your Oil Filter Stuck?
| Step | Action |
| 1 | Ensure the engine is turned off and cool before starting. |
| 2 | Locate the oil filter and inspect for any visible damage. |
| 3 | Use an oil filter wrench for a secure grip on the filter. |
| 4 | Apply steady even pressure counterclockwise to loosen. |
| 5 | If the filter is stuck tap the bottom gently with a mallet. |
| 6 | Apply heat using a hairdryer to expand the metal slightly. |
| 7 | If unsuccessful employ a strap wrench for additional torque. |
| 8 | For extreme cases consider professional assistance to remove a broken oil filter. |
Step-by-Step Guide: Removing the Broken Oil Filter
Accidents happen and when you find yourself with a broken oil filter it’s crucial to address the issue promptly and correctly. Follow this step-by-step guide to safely remove a broken oil filter without causing further damage to your vehicle.
Safety First
Before you start ensure your safety by wearing protective gear such as gloves and safety glasses. It’s also wise to place an oil absorbent mat under the vehicle to catch any oil that may leak during the process.
Locate the Broken Filter
Identify the broken oil filter’s location beneath your vehicle. This is near the engine adjacent to the oil pan. Take a moment to assess the damage and determine the extent of the breakage.
Gather Your Tools
To remove the broken oil filter you’ll need a few essential tools. Grab an oil filter wrench a pair of pliers and a bucket to collect any residual oil. Make sure the tools are appropriately sized for your vehicle’s filter.
Drain Excess Oil
Before attempting to remove the broken filter drain any excess oil that may have spilled. This helps prevent a mess and makes the extraction process more manageable.
Use the Oil Filter Wrench
Secure the oil filter wrench around the intact portion of the broken filter. Apply steady even pressure in a counterclockwise direction to loosen the filter. If the filter is too damaged for the wrench proceed to detail next.
Utilize Pliers for Stubborn Filters
If the oil filter wrench proves ineffective use a pair of pliers to grip the remaining filter casing. Slowly turn the pliers counterclockwise to loosen the filter. Exercise caution to avoid causing further damage.
Remove Residual Pieces
Once the broken oil filter is detached inspect the filter housing for any remaining pieces. Use pliers or a similar tool to remove any remnants ensuring a clean and smooth surface for the new filter.
Clean and Install a New Filter
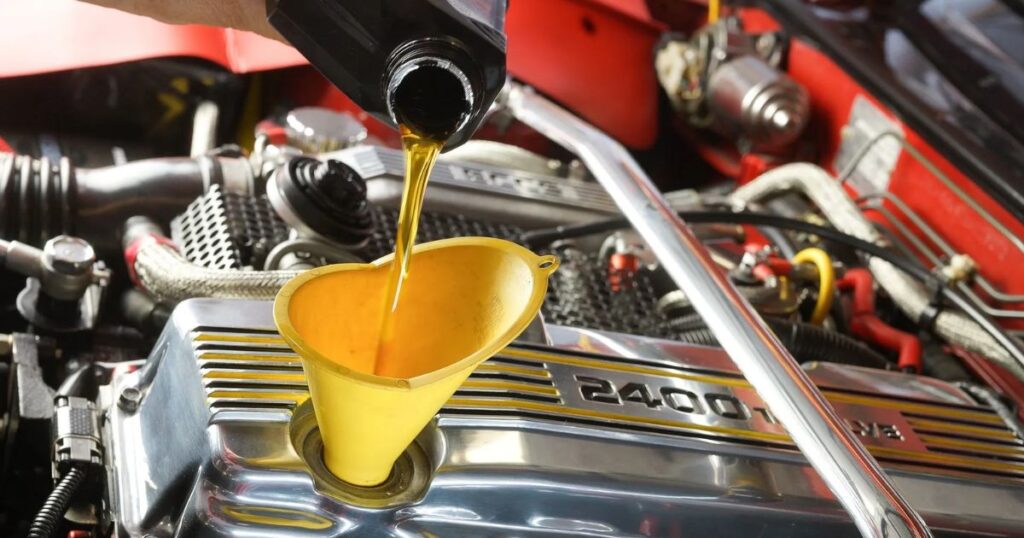
Wipe the filter housing with a clean rag to remove any debris. Install a new oil filter ensuring it’s securely tightened. Double-check for leaks and replenish the oil if necessary.
Remove a Broken Oil Filter
Without complications by following these straightforward steps. Remember taking the time to address a broken oil filter promptly can prevent potential engine damage and keep your vehicle running smoothly.
Preventing Future Issues
Preventing future issues is essential for maintaining the longevity and efficiency of various systems and equipment. Regular maintenance is a key aspect of this preventive approach. By conducting routine check-ups and addressing minor problems before they escalate individuals can avoid costly repairs and downtime.
Regular inspections can help identify potential issues such as wear and tear leaks or malfunctions allowing for timely intervention. For instance, in the case of a vehicle changing the oil and inspecting the oil filter at recommended intervals is crucial for preventing engine damage and ensuring optimal performance.
A specific preventive measure that aligns with the broader goal of avoiding future problems is to remove a broken oil filter promptly. The oil filter plays a vital role in trapping contaminants and preventing them from circulating in the engine. If the oil filter becomes damaged or breaks it can lead to a compromise in the engine’s lubrication system potentially causing severe damage.
By regularly checking and replacing the oil filter and addressing any issues promptly individuals can mitigate the risk of a broken oil filter causing engine problems. This simple yet crucial step contributes to the overall preventive maintenance strategy.
Education and awareness play a pivotal role in preventing future issues. Providing individuals with information on proper usage handling and maintenance procedures empowers them to make informed decisions.
Whether it’s understanding the correct oil filter replacement process or following recommended guidelines for equipment care knowledge-sharing initiatives contribute significantly to preventing avoidable problems in various settings.
Dispose of the Broken Oil Filter
When faced with a broken oil filter in your vehicle it is crucial to handle the situation promptly and safely. Removing a broken oil filter requires a few simple steps to ensure that no residual oil leaks or causes further damage.
First locate the oil filter and carefully inspect it for any visible damage. If the filter is broken or damaged use an oil filter wrench to carefully loosen and remove the remaining pieces. It’s essential to place an oil pan beneath the filter to catch any oil that may spill during the process.
Once the broken oil filter is removed, properly dispose of it in accordance with local regulations. Many auto parts stores and recycling centers accept used oil filters for recycling. It’s important not to simply throw the broken filter in the regular trash as it may contain harmful substances.
Clean the surrounding area and wipe off any spilled oil to prevent environmental contamination. Removing a broken oil filter is a straightforward task that when done correctly, ensures the safe disposal of the damaged filter while maintaining the cleanliness of your workspace.
To remove a broken oil filter efficiently, start by using an oil filter wrench to carefully loosen and detach the remaining pieces. Make sure to place an oil pan beneath the filter to catch any spilled oil during the process.
Properly dispose of the broken filter at a local auto parts store or recycling center adhering to environmental guidelines. This ensures a clean and responsible approach to handling a broken oil filter while promoting eco-friendly practices in automotive maintenance.
Tips for Further Car Maintenance

- Regular Oil Changes: Schedule routine oil changes to ensure the engine stays lubricated and functions optimally. In the event of a broken oil filter it’s crucial to address the issue promptly.
- Remove a Broken Oil Filter: Familiarize yourself with the proper technique for removing a broken oil filter. This skill can be invaluable in preventing potential engine damage. In the event of a broken filter use an oil filter wrench to carefully extract the remnants without causing further harm.
- Tire Pressure Maintenance: Regularly check and maintain the recommended tire pressure. Properly inflated tires not only improve fuel efficiency but also contribute to a smoother and safer driving experience.
- Brake System Inspection: Periodically inspect the condition of brake pads and ensure that the brake fluid is at the recommended levels. A well-maintained brake system is essential for safe driving and effective stopping power.
- Light and Electrical Checks: Verify that all lights including headlights brake lights and turn signals are in working order. Electrical issues can compromise safety so addressing any faulty lights promptly is crucial for overall vehicle maintenance.
Frequently Asked Questions
How do you remove a stuck oil filter without tools?
Use a screwdriver to puncture the filter and twist it off by hand. Be cautious to avoid spillage and injuries.
What happen if oil filter is broken?
A broken oil filter can lead to inadequate oil filtration reduced engine performance increased wear and tear and potential engine damage.
How can you remove an oil filter without breaking it?
To avoid breaking an oil filter use an oil filter wrench for a secure grip loosen it carefully and drain oil properly before removal.
How do you remove a tight oil filter?
Use an oil filter wrench to grip the tight filter turn counterclockwise to loosen. Remove by hand once loose avoiding spills.
Conclusion
Mastering the art of removing a broken oil filter is essential for any car enthusiast or DIY mechanic. The process demands patience precision and the right tools. As highlighted in the comprehensive guide one must first assess the situation ensuring safety precautions are in place. The step-by-step instructions provided underscore the significance of using appropriate tools like oil filter wrenches and screwdrivers. By following these guidelines individuals can confidently tackle the task without causing further damage to the engine or surrounding components.
How to Remove a Broken Oil Filter? Serves as a reliable resource for those faced with this challenging scenario emphasizing the importance of methodical execution. Remembering key insights such as turning counterclockwise and avoiding excessive force ensures a successful oil filter extraction. This guide empowers individuals to navigate unexpected setbacks with finesse reinforcing the significance of preparedness and skill in automotive maintenance.

Alexander Quinn is the author behind Filterabout.com. Known for expertise in diverse topics, Quinn’s content on the website reflects a versatile knowledge base catering to various interests.


![Jynxzi Age, Net Worth, Career[2024]](https://filterabout.com/wp-content/uploads/2024/05/Who-Is-Shanin-Blake-Age-Wiki-Parents-Dating-Net-Worth-300x148.jpg)
![Jynxzi Age, Net Worth, Career[2024]](https://filterabout.com/wp-content/uploads/2024/05/Jynxzi-Age-Net-Worth-Career2024-300x148.jpg)


![Kutty Surumi Net Worth, Bio, Age[2024]](https://filterabout.com/wp-content/uploads/2024/05/Kutty-Surumi-Net-Worth-Bio-Age2024-300x148.jpg)


![Jynxzi Age, Net Worth, Career[2024]](https://filterabout.com/wp-content/uploads/2024/05/Who-Is-Shanin-Blake-Age-Wiki-Parents-Dating-Net-Worth-150x150.jpg)